Introduction
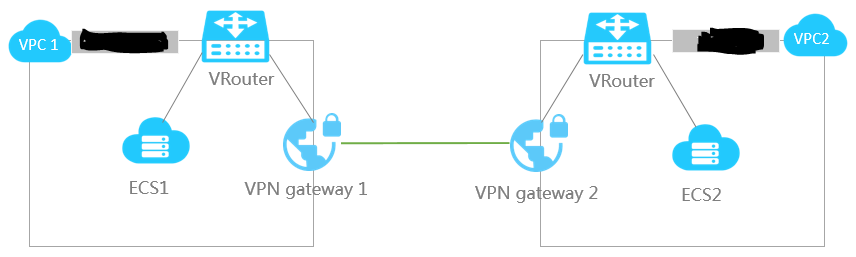
This article shows you how to use the on premises "CyberRoam" Firewal to create a Site-to-Site VPN gateway connection and Deploy a VPN gateway appliance (FLEXGW) from your Alibaba Cloud portal and connect it to the VNet.
Flex is a one of its kind Internet Gateway that provides added flexibility and manageability compared to any other public access Internet Gateways. It is easy to install and manage with multiple customization options for an excellent user experience in high demand public wired and Wi-Fi Internet access
Flex is a one of its kind Internet Gateway that provides added flexibility and manageability compared to any other public access Internet Gateways. It is easy to install and manage with multiple customization options for an excellent user experience in high demand public wired and Wi-Fi Internet access
This guide will provide quick steps to configure Site-to-Site.

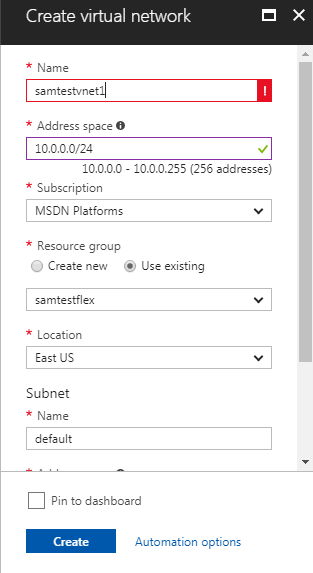
Configuration of the Alibaba Cloud Portal
Login to you Alibaba Cloud Portal and open another browser tab. Look for Alibaba cloud marketplace.
Go to the search space at right-hand corner and find “FlexGW IPsec VPN on CentOS”
Deploy the appliance as an instance in the default VPC.
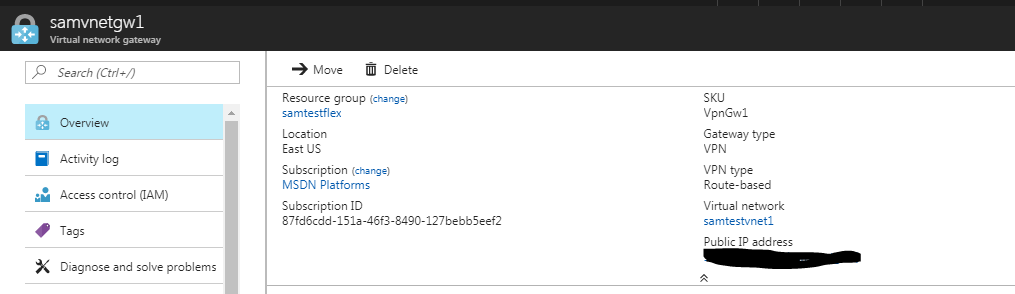
Once deployed, reset the password and restart the VM.
Go back to the ECS console and check that your ECS instance is up and running:
 Change the default security group rules to enhance your application security:


Similarly add ports : 443 / 500 / 4500.
Open your browser and paste the Public IP of the instance at https://publicip/

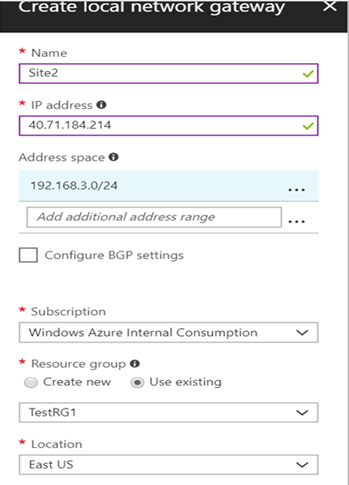
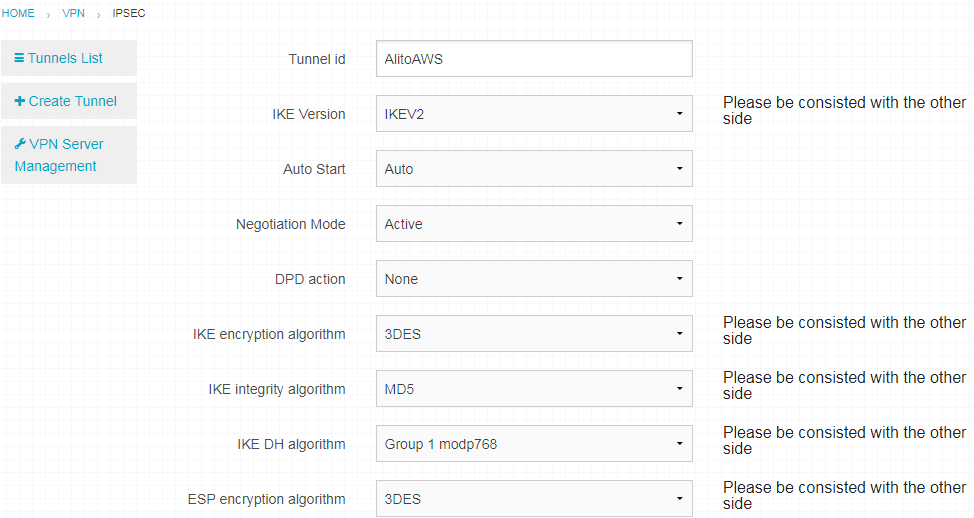
Create a VPN tunnel Create an appropriate VPN tunnel by providing the necessary details:


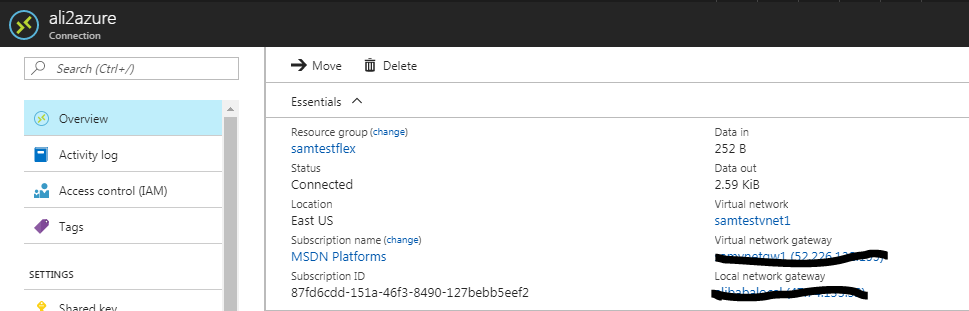
Save and finish the configuration. Check the tunnel list:

On CyberRoam (on-prem) Firewall:
Login to your CyberRoam Firewall and Navigate to Objects > Hosts, and create new for record for Alibaba Cloud's local subnet.

Navigate to VPN > Policy and create a new policy. Make sure you match the Algorithm parameters in this policy with the one in FlexGW.


save the configuration.
Navigate to VPN > IPSEC and enter the public IP and local subnet information properly.
Make sure the preshared key is same on both the side.

Save the configuration and go back to your FlexGW to check if the Tunnel is online.
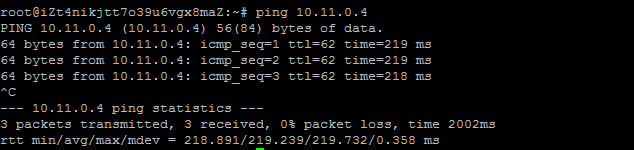
To test it further, you can deploy a virtual machine on both sides and do a ping test.
Go back to the ECS console and check that your ECS instance is up and running:


Similarly add ports : 443 / 500 / 4500.
Open your browser and paste the Public IP of the instance at https://publicip/
Create a VPN tunnel Create an appropriate VPN tunnel by providing the necessary details:


Save and finish the configuration. Check the tunnel list:
On CyberRoam (on-prem) Firewall:
Login to your CyberRoam Firewall and Navigate to Objects > Hosts, and create new for record for Alibaba Cloud's local subnet.

Navigate to VPN > Policy and create a new policy. Make sure you match the Algorithm parameters in this policy with the one in FlexGW.


Navigate to VPN > IPSEC and enter the public IP and local subnet information properly.
Make sure the preshared key is same on both the side.

Save the configuration and go back to your FlexGW to check if the Tunnel is online.
To test it further, you can deploy a virtual machine on both sides and do a ping test.